Plaster walls lend a timeless charm to homes, churches, and historical buildings, offering both beauty and durability. However, as these structures age, so does the plaster, leading to cracks, holes, and sometimes more serious structural issues. Whether you’re restoring a historic church or updating an older home, knowing how to fix plaster walls is essential. Equally important is recognizing when it’s time to hand the job over to the professionals.
Table of Contents
Key Takeaways
✔ Hairline cracks are minor but should be properly cleaned, bonded, patched, and painted to prevent spreading and preserve both function and appearance.
✔ Small holes and mid-sized cracks require mesh tape, compatible plaster materials for restoration, and careful layering to ensure durability and visual consistency.
✔ Extensive damage needs reinforcement of the lath, multi-layer plastering, and full curing time—especially in historic buildings where lime plaster used in historic churches is essential for accurate restoration.
✔ Bulging plaster can often be saved by reattaching it to the lath using adhesive or washers, making it possible to maintain original finishes without full removal.
✔ Always allow plaster to dry completely and use breathable primers and historically appropriate paint to protect and preserve the repaired surface long-term.
What Are Plaster Walls?
Plaster is one of the oldest and most trusted building materials, known for its durability, natural composition, and elegant finish. Composed of a blend of lime or gypsum, sand, and water, plaster is applied in multiple layers over a substrate—typically wooden or metal lath—to create a strong, smooth surface.
Historically used in homes, government buildings, and places of worship, plaster continues to be a preferred material in restoration projects, especially when preserving original church wall finishes or historic architecture. Its aesthetic value and acoustic properties make it particularly suited for sanctuaries, chapels, and other sacred spaces.
Although drywall has become the go-to wall covering in modern construction, plaster remains a valuable material in:
- Restoration projects: Especially where authenticity and period-correct materials are essential.
- Soundproofing needs: Due to its density and layered application.
- Moisture regulation: Particularly with lime plaster used in historic churches, which allows walls to breathe.
- Fire resistance: Plaster acts as a natural fire barrier.
Common Problems in Plaster Walls
Plaster is resilient, but time, weather, and building movement can lead to deterioration. Recognizing early signs of damage can help you decide whether a DIY fix is sufficient or if professional help is needed.
- Hairline cracks: Often appear due to seasonal expansion and contraction. Though typically cosmetic, they can worsen over time if ignored.
- Small holes and abrasions: Caused by furniture bumps, hanging objects, or general wear and tear.
- Bulging or bubbling: Usually a sign of water damage or plaster detachment from the lath behind it.
- Sagging or delaminating: Especially common in ceilings or upper walls exposed to moisture or poor ventilation.
Causes of Plaster Wall Damage
Understanding what leads to plaster deterioration is key to preventing future issues and ensuring that repairs last. Here are some of the most common causes:
- Foundation settlement: Even minor shifts in a building’s foundation can lead to cracks and surface deformation.
- Vibration or impact: Slamming doors, heavy foot traffic, or nearby construction can stress walls and ceilings.
- Inappropriate repair techniques: Using incompatible patching materials or quick-dry compounds can compromise the wall’s integrity. Matching the compatible plaster materials for restoration is essential for performance and appearance.
- Leaks or water intrusion: Faulty plumbing, damaged roofs, or overflowing gutters can saturate lath and plaster, causing mold growth and sagging—especially in lightweight buildings, where internal temperatures are highly sensitive to external conditions like fluctuating weather and solar radiation.
- Non-breathable paint: Modern paints may trap moisture, especially over lime plaster used in historic churches, leading to bubbling, staining, and decay.

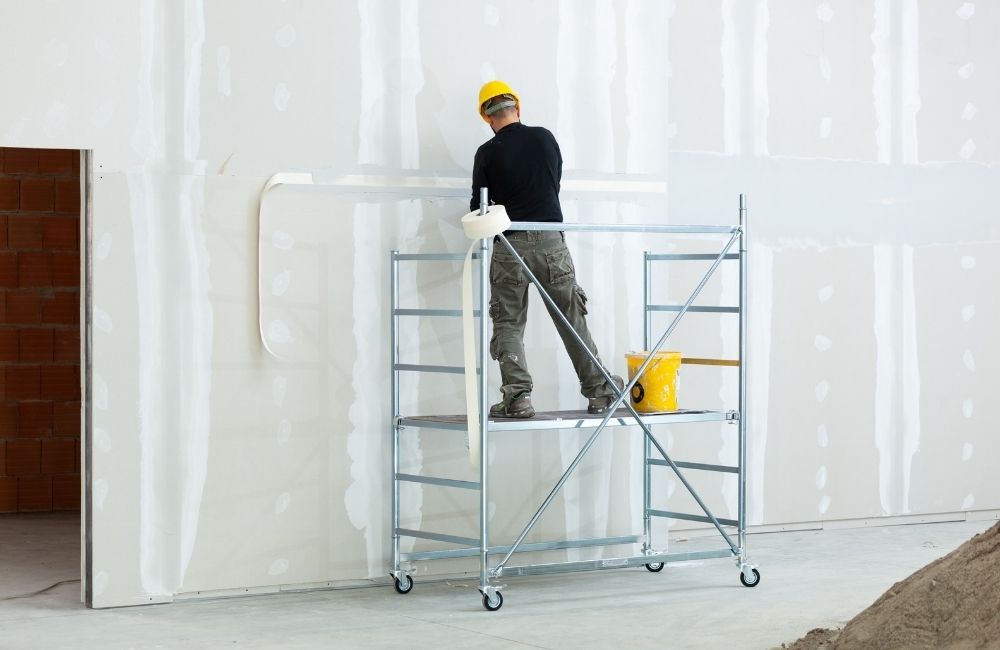
How to Fix Plaster Walls: Step-by-Step Guide
Now that you’re equipped with the right tools and materials, it’s time to dive into how to fix plaster walls properly. These techniques apply to both residential spaces and historic properties, such as churches, where authenticity, durability, and visual continuity are key. Whether you’re restoring an antique hallway or preserving original church wall finishes, following these steps ensures your repair stands the test of time.
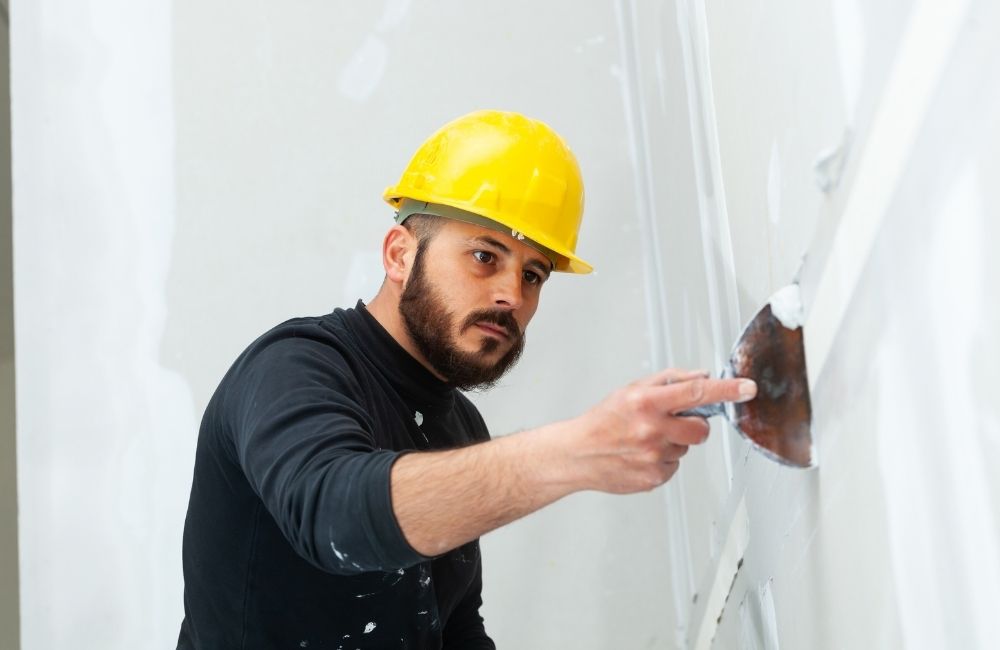
1. Repairing Hairline Cracks
Hairline cracks are among the most common issues in plaster walls. They often result from temperature changes, building settlement, or age-related wear. These cracks are typically cosmetic but still require proper treatment to prevent expansion or moisture intrusion.
Steps to Repair
- Score the Crack: Use a utility knife to widen and clean the crack slightly. This helps the new plaster adhere better.
- Remove Dust and Debris: Brush out any loose particles with a dry brush or vacuum.
- Apply Bonding Agent: Use a liquid bonding agent or plaster conditioner to prime the crack.
- Patch with Plaster: Apply a thin coat of patching plaster or joint compound using a putty knife. Feather the edges to blend into the existing wall.
- Dry and Sand: Allow the compound to dry completely. Sand smooth using fine-grit sandpaper.
- Prime and Paint: Use a quality primer before painting the wall to prevent flashing.
For heritage buildings, always choose compatible plaster materials for restoration. This is especially important when working in structures that require preserving original church wall finishes.
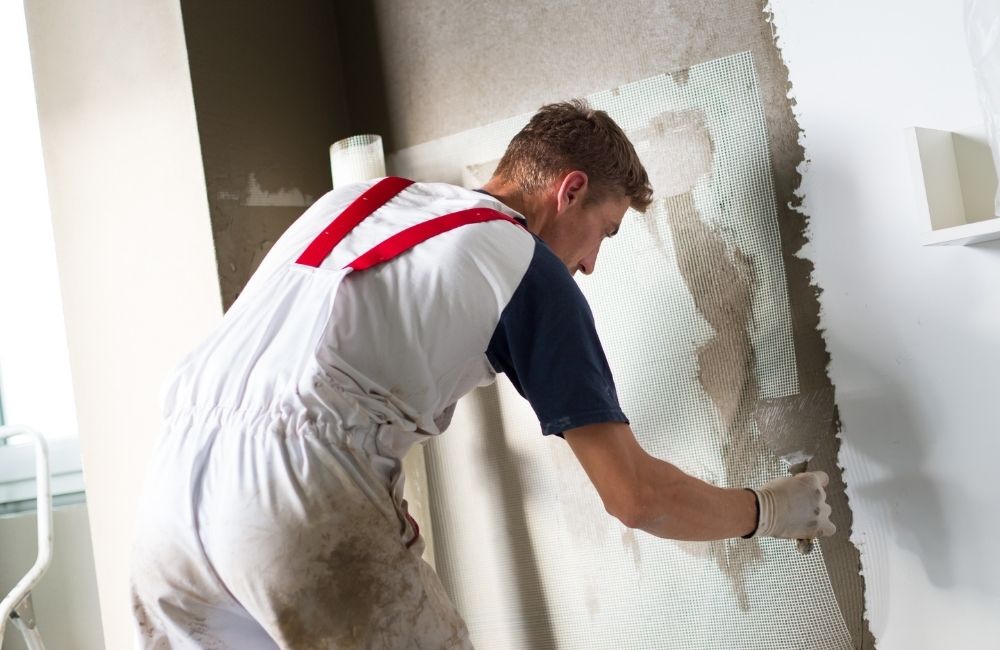
2. Patching Small Holes or Medium Cracks
Cracks or holes under six inches in diameter are fairly straightforward to repair, but the right technique and materials are key for a long-lasting result.
Materials You’ll Need
- Fiberglass mesh tape
- Patching plaster or lime-based plaster
- Sandpaper
- Primer and paint
Repair Process
- Clean the Area: Remove any loose plaster, paint, or dust.
- Apply Mesh Tape: Place fiberglass mesh tape over the crack or hole. This adds strength and prevents future cracking.
- First Coat of Plaster: Apply a thin coat of plaster over the tape, feathering the edges.
- Second Coat: Once dry, apply a second coat for additional coverage.
- Sand, Prime, and Paint: Sand smooth, apply primer, and paint to match the rest of the wall.
When working on ecclesiastical properties, use materials used in church wall plaster to maintain authenticity. Using the wrong compound, such as gypsum on lime walls, can lead to cracking or incompatibility.
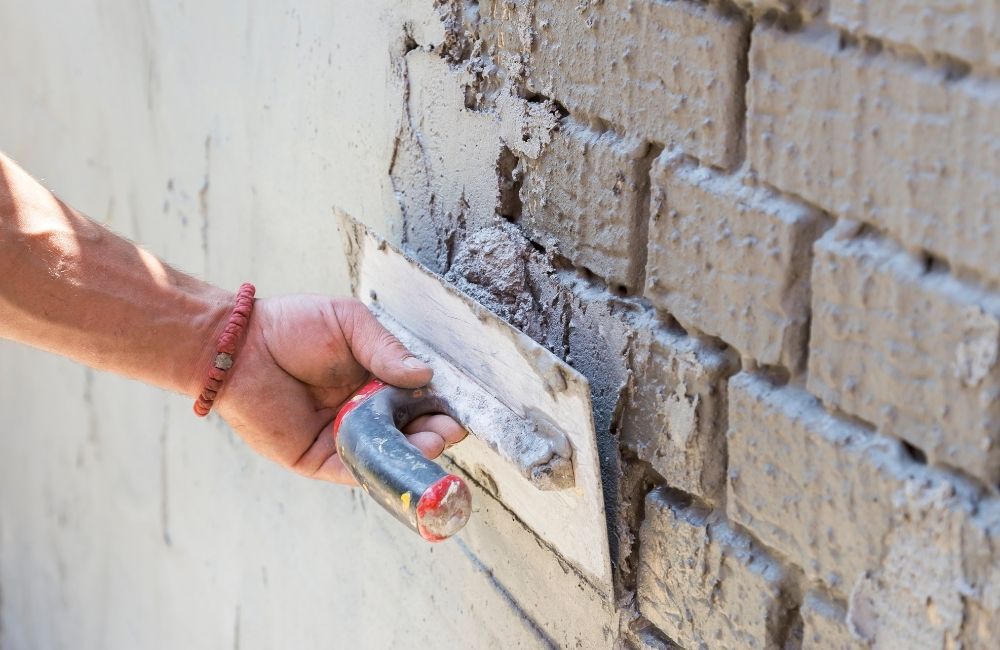
3. Fixing Large Holes or Deep Cracks
Significant damage often exposes the wooden or metal lath beneath the plaster. This type of repair requires extra reinforcement and precision, especially in churches or historic buildings.
What You’ll Need
- Plaster washers
- Wood or metal lath (if necessary)
- Base coat plaster (lime or gypsum, depending on original material)
- Scratch and finish coats
Step-by-Step Instructions
- Cut Away Loose Plaster: Use a utility knife or oscillating tool to remove all compromised plaster until you reach firm, stable material.
- Reinforce the Lath: If lath is missing or broken, replace it with wood or metal lath. Secure it tightly to wall studs.
- Anchor with Washers: If the original plaster has detached but is still salvageable, re-anchor it using plaster washers and screws. This technique pulls the old plaster tight against the lath.
- Apply Base Coat: Begin with a base coat of lime plaster (for historical accuracy) or patching plaster. Apply using a hawk and trowel.
- Add Scratch Coat: Score the surface of the base coat with a plasterer’s comb to allow the next layer to adhere.
- Finish Coat: Apply a smooth finish coat, feathering the edges into the surrounding wall.
- Cure, Sand, and Paint: Allow full curing time—especially for lime plaster—before sanding and painting.
For plaster matching for church renovation, using lime plaster used in historic churches is essential. It provides the same flexibility and vapor permeability as the original material, ensuring both structural and visual harmony.
4. Stabilizing Bulging or Detached Plaster
Bulging areas in plaster walls usually indicate that the plaster has detached from the lath behind it. This is common in ceilings or high-traffic areas of old churches and homes.
Signs of Detached Plaster
- A hollow sound when tapped
- Visible bulge or dome on the surface
- Fine cracks forming around a raised area
How to Fix It
- Drill Inspection Holes: Carefully drill small holes around the bulge to assess the extent of detachment.
- Secure with Adhesive or Washers: Inject construction adhesive into the holes to re-bond plaster to lath. Alternatively, use plaster washers to mechanically reattach the plaster.
- Patch Holes: Once stabilized, fill the drilled holes with patching plaster.
- Finish Surface: Sand the area smooth and apply matching texture if necessary.
- Prime and Paint: Complete the restoration with primer and matching paint.
This technique is crucial in preserving original church wall finishes without removing or replacing significant portions of historic plaster. Be sure to use compatible plaster materials for restoration that reflect the materials used in church wall plaster.
5. Painting Over Repaired Plaster
After repairing any plaster wall, finishing with the right paint is essential for appearance and protection.
Steps to Follow
- Allow Full Drying Time: Ensure all plaster coats are completely dry. For lime plaster, this may take several days depending on humidity.
- Prime the Surface: Use a breathable primer if working with lime plaster. Avoid oil-based primers which may trap moisture.
Choose the Right Paint
- Latex Paint: Good for general interior walls.
- Moisture-Resistant Paint: Ideal for kitchens and bathrooms.
- Mineral or Limewash Paint: Recommended for historic walls to maintain breathability.
- Blend with Existing Finishes: Feather the paint into adjacent areas to maintain consistency, especially in visible locations like church naves or sanctuaries.
Before applying modern coatings in older buildings, test the area to ensure compatibility. This step is particularly important when dealing with lime plaster used in historic churches or when maintaining plaster matching for church renovation standards.
When to Call the Pros
Learning how to fix plaster walls can be a rewarding DIY project, but some repairs go beyond surface-level cracks and patching. Structural issues, moisture damage, or historically significant buildings require the precision, experience, and tools of a professional plaster contractor in Connecticut.
Knowing when to stop and seek expert help can make the difference between a long-lasting restoration and a repair that fails within months. If you’re working on a historic home, an older church, or simply want a flawless finish, here’s when you should consider calling in the pros.
Warning Signs That Require Professional Help
While minor cracks and dings can usually be tackled with basic tools and patience, the following warning signs indicate problems that often exceed DIY capabilities:
- Cracks wider than ¼ inch: These are often signs of structural shifting or lath separation and may require re-anchoring the wall, not just surface filling.
- Sagging or bulging plaster: If large sections of the wall feel soft, bulge outward, or sag—especially in ceilings—it often means the plaster has separated from the lath. This can become hazardous if not stabilized properly.
- Persistent bubbling paint: Bubbling or peeling paint could be a sign of trapped moisture behind the plaster, often from leaky roofs or plumbing.
- Recurring damage after DIY fixes: If you find yourself repairing the same cracks or holes repeatedly, the root cause may not have been addressed properly.
- Mildew or mold odors: Musty smells from inside the wall suggest excess moisture or poor ventilation—conditions that require more than cosmetic repair.
If you’re unsure whether the damage is minor or serious, it’s best to schedule a professional inspection. Specialists in historical restorations will also evaluate the composition of the materials used in church wall plaster to ensure the correct treatment method is used.
Why Hiring a Professional Plasterer Is Worth It
Professional plaster contractors bring a wealth of expertise, particularly when it comes to compatible plaster materials for restoration and historically significant structures like churches or heritage homes. Typical project costs range between $2,000 and $8,000 for a standard-sized room, so it’s crucial to hire the right pros for the job.
Specialized Knowledge and Skill
- Mastery of traditional plastering techniques: Professionals know how to apply the base coat, scratch coat, and finish coat correctly for long-term durability. They are trained in the use of lime plaster used in historic churches, which behaves very differently than modern gypsum-based products.
- Understanding of building history and structure: Older homes and religious buildings often use materials and wall assemblies no longer found in modern construction. A professional understands the legacy of these materials and how to work with them safely and effectively.
Precision in Historic Restoration
- Expertise in plaster matching for church renovation: Matching the texture, color, and composition of old plaster is an art. Pros can replicate everything from smooth Venetian finishes to intricate ornamental details.
- Experience preserving original church wall finishes: Churches often feature decorative plasterwork, murals, or patina finishes that must be preserved—not replaced. A trained contractor will know how to repair without damaging the artistry.
- Knowledge of compatible materials used in church wall plaster: Professionals ensure that new layers of plaster bond correctly with old substrates. Using the wrong materials can cause delamination, cracking, and further degradation.
Tools and Techniques You Won’t Find at the Hardware Store
Professional plasterers often have access to tools, additives, and restoration products that aren’t readily available to the average homeowner. These include:
- Precision floats and hawks for ornamental work
- Plaster bonding agents designed specifically for heritage materials
- Lime putty cured for optimal elasticity
- Natural pigments and tints for authentic color matching
These tools are critical when working with lime plaster used in historic churches, which requires careful mixing and curing for breathability and structural integrity. Modern plaster compounds often dry too quickly or lack the flexibility needed for older walls.
Frequently Asked Questions
How to know if a plasterer has done a good job?
A well-done plastering job will appear smooth, even, and free from blemishes or trowel marks. The finish should have no waves, ridges, or patchiness when viewed in natural light. Edges and corners should be sharp and consistent, and the wall should be ready for paint without needing extra sanding or filling. High-quality work blends seamlessly with surrounding surfaces and shows careful attention to detail.
What skills does a plasterer need?
Plasterers must have strong hand skills and good coordination, along with a solid understanding of construction methods and materials. They need to be precise, patient, and able to follow instructions or plans accurately. Good communication, problem-solving, and the ability to stay calm under pressure are also essential, especially when working on detailed or restoration-based projects.
How to estimate plastering work?
To estimate plastering needs, calculate the surface area and multiply it by the thickness of the plaster to get the total volume. Then divide that volume based on your mix ratio—such as 1:4 for cement to sand. Divide the total volume by the sum of the ratio parts to determine how much of each material you’ll need. It’s wise to include a little extra to account for waste.
How many days of curing are needed for wall plastering?
Plaster should be cured after it has set to ensure proper hardening and to prevent cracking. A curing period of at least seven days is typically recommended, especially for cement-based plaster. During this time, keep the surface moist and protected from direct sun or wind to avoid premature drying.
What happens if it rains after plastering?
If rain directly hits freshly plastered walls, it can damage the surface—washing away lime or causing the plaster to erode. However, humid conditions caused by rain can help slow the drying process, which supports better curing. It’s important to cover exterior work during rainfall to protect the fresh plaster from direct water exposure.
Restore with Purpose, Repair with Precision
Fixing plaster walls requires skill, patience, and the right materials—especially when working in sacred or historically significant spaces. That’s why for churches, temples, and historic properties across Connecticut, Artech Church Interiors, Inc. stands out as the trusted name in plaster repair and restoration. By managing your project from start to finish, we ensure every step meets the highest standards of quality and care.
Contact Artech Church Interiors, Inc. today—and let the experts restore beauty, integrity, and reverence to your sacred space.